Showing posts with label MOPs. Show all posts

1.23.2013

Painted Tote Tutorial

It's that time again! Our MOPs group has started the second semester and we are back into craft mode. This week's craft should have been a painted tote (thanks to the cold, we had to cancel!). I'm sure we will work it in later, though. Because, really, who doesn't love a re-useable bag? (View other MOPs crafts here, here, here, and here)


It's so easy and takes very little time, not to mention it is super inexpensive!

Step 1: Gather your supplies
--Canvas tote bag (I got mine at Hobby Lobby for $1.99 plus a coupon discount)
--Stencil (I used half a doily)
--Paint and brush
--Piece of cardstock or other thick paper

Step 2: Place your cardstock inside the bag, so the paint won't bleed through. (Trust me, I learned from experience!)

Step 3: Place stencil where you want it on your bag and brush or dab on paint.

Step 4: Peel off stencil and let paint dry. Once it's dry, you can take the paper out of the bag.

That's it! Now you have a super cute, functional bag to use.

Photobucket
Pin It!

11.28.2012

Snowman Hot Chocolate

Here's another MOPs craft for you ladies! I'm calling this one Snowman Hot Chocolate. It makes a really cute gift (we made it to give to our neighbors) or just use it as a decoration. My goal for the MOPs crafts is to do something that doesn't take a lot of time or effort, that way the ladies can focus on chatting with each other while they do it, so this doesn't require much of either of those!

I found the idea from Pinterest (where else?) and put my own spin on it.

Step 1: Gather your supplies
3 jars with lids
Red felt strip (or you could use fabrics instead of felt)
Black felt strip
Peppermints
Hot chocolate
Mini marshmallows
Hot glue gun


Step 2: Hot glue the black felt around one of the lids to make the hat. (I glued a long line onto the felt and sort of rolled the lid onto it)


Step 3: Fill your jars with peppermints, marshmallows, and hot cocoa. 


 Step 4: Hot glue the red felt into a scarf shape and drape around the hot cocoa jar.


 Step 5: Paint eyes and a nose (and a mouth if you want!) on the marshmallow jar. (I used puff paint.)


Step 5: Stack your jars on top of each other and you have adorable Snowman Hot Chocolate.


**Update: I've had a few people ask where we got the jars to make this. We bought them at Specialty Bottle.
Photobucket
Pin It!

11.14.2012

iSpy Bottle

I feel like I'm always looking for new ways to entertain my toddler. Most moms I know say they end up "rotating" their kids' toys so they don't get bored with them. I saw a this on Pinterest and thought it was a great idea to keep kids busy!

We ended up doing this as one of our MOPs crafts. (See the other crafts we've already done here and here.) It was really cheap and really easy.
What you need:
Bottle (we recycled water bottles)
Misc. items (to make it really inexpensive, find things you already have laying around the house!)
Rice
Hot glue gun
Funnel
Index card (optional)

Step 1: Gather your supplies.
 Step 2: (Optional) Write out your items so your kids can look for specific things.
 Step 3: Fill your bottle with items.
 Step 4: Pour your rice into your bottle (I used a funnel and it was a lot less messy!)
Step 5: Shake until the items are mixed in and hot glue your lid on (to prevent spills).

And there you have cheap entertainment!
Photobucket
Pin It!

10.25.2012

Sandpaper Crayon T-shirts


Sandpaper Crayon T-shirts Tutorial
I have a little tutorial for you today. I’m involved in Mothers of Preschoolers (Mops) at my church and am the Creative Activities Coordinator (I make up crafts for us to do). It’s so much fun and I’ve found tons of fun things for us to do! The last craft we made I posted about here. It's a post-it note clipboard. Great for teacher gifts! 

This week, we made Sandpaper Crayon T-shirts. We drew them on onesies to give to our local Women’s Resource Center. It’s a super easy project, and really fun! If you have older kids, it would definitely be something they can do.

Anyways, here’s the tutorial.
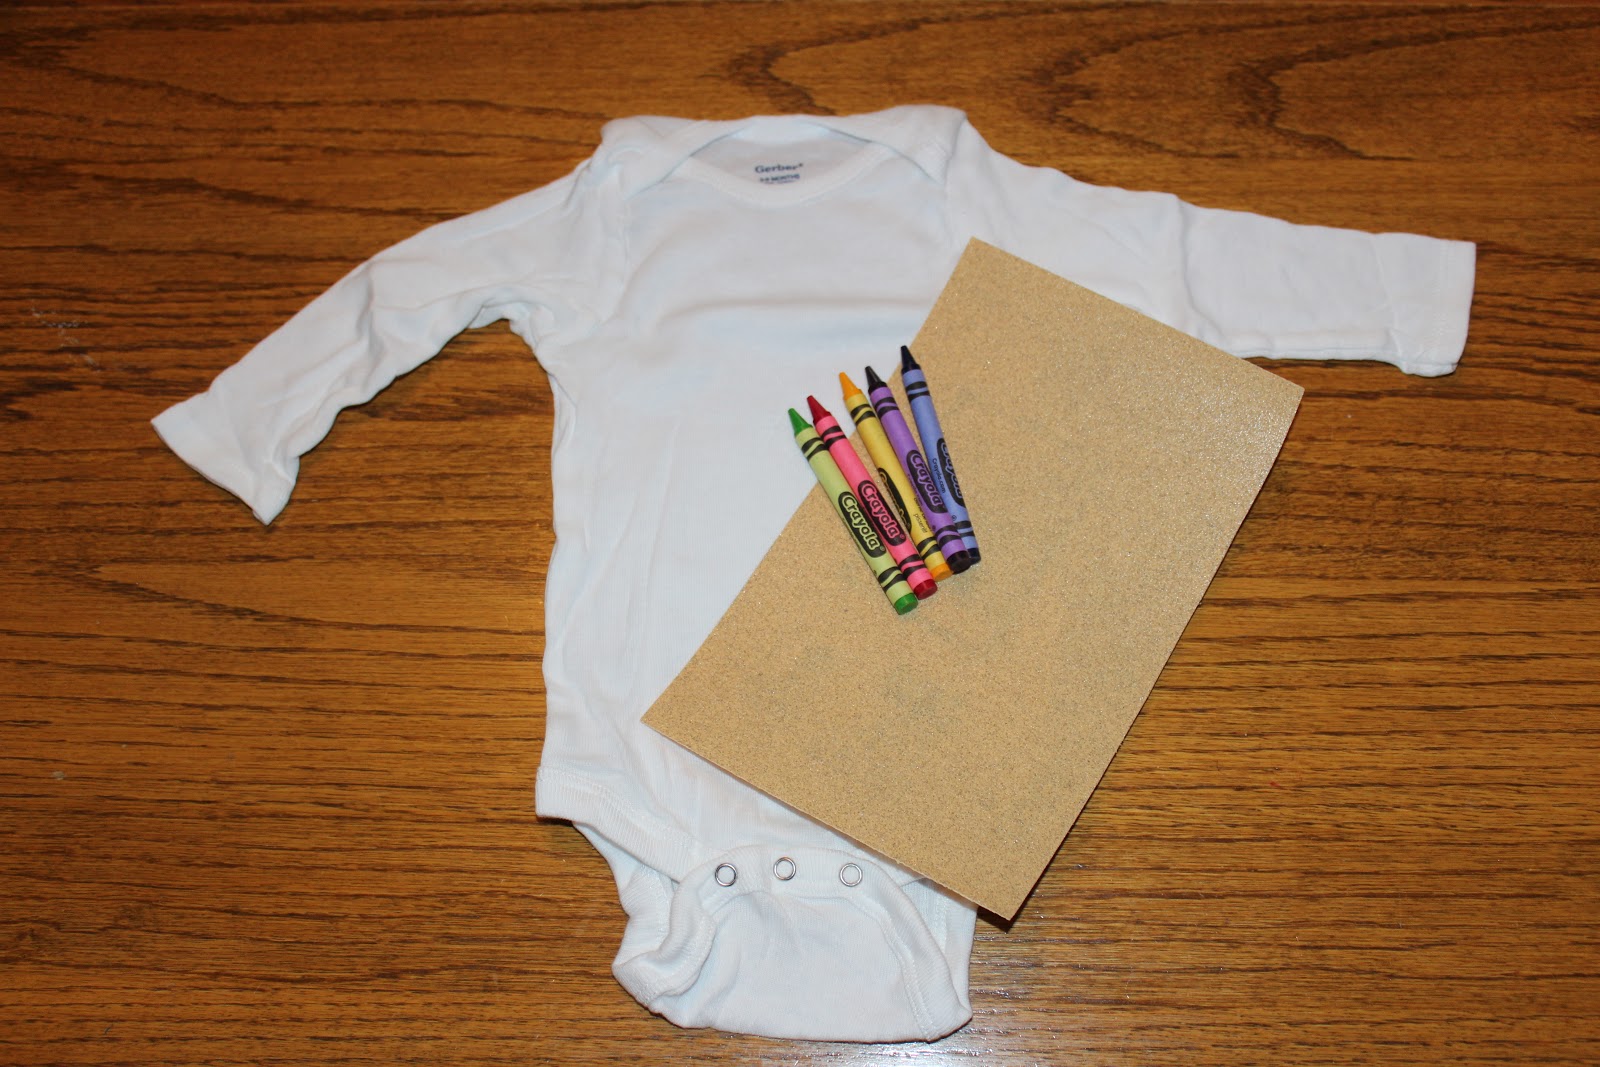
Step 1: Gather your supplies (onesie or other piece of clothing, sandpaper, crayons, iron,  paper towel, and a piece of scrap cardboard)


Step 2: Color a picture onto your sandpaper. (This will be reversed, so remember to draw things backwards from the way you want it to look!)


Step 3: Place your cardboard INSIDE your onesie. (This will prevent the crayon from bleeding through.)


Step 4: Place sandpaper with the drawing side down and put paper towel over top of the sand paper to keep your iron from getting damaged.


Step 5:  Iron on paper towel for about 30 seconds, making sure to cover all of the drawing.


Step 6: Remove the paper towel and the sand paper. You should have a drawing on your onesie now!


Step 7: Place your paper towel directly onto the onesie and iron to remove the extra wax.


Step 8: Remove the cardboard from inside and enjoy your new product!


Photobucket
Pin It!

9.26.2012

Post-it Note Clipboard

I am involved in a group called Mothers or Preschoolers (or MOPs) at my church. We meet twice a month and get to relax, take a break from our kids, and talk to other moms about life. Once a month we do a craft together, and this year, I'm in charge of the crafts. 

Our theme for MOPs this year is "Plunge- love as if your life depended on it" which is taken from 1 Peter 4:8. I've tried to incorporate crafts this year into how we can love others. Every craft we are doing is going to be a gift to someone. The first craft we did is the Post-it Note Clipboard and it is a gift for our kids' teachers. 

I found this idea on Pinterest and LOVED it! 

Here is my little tutorial for you! It's super easy, but I took pictures of each step so you can see. 

Step 1: Gather your supplies. 
-cardboard coaster
-scrapbook paper
-post-it note pad
-binder clip
-embellishment (flower, button, ribbon, etc.)
-scissors
-mod podge and brush
-sanding block

Step 2: Brush mod podge onto your coaster.

Step 3: Place your scrapbook paper on top of mod podged coaster.

Step 4: Cut off excess paper.

 Step 5: Use sanding block to rough up edges.

 Step 6: Mod podge flower onto clip. 


Step 7: Clip post-it pad onto coaster.

Visit my linky page to see where I'm linking up to!
Photobucket

http://www.thethriftyhome.com/2012/09/156th-penny-pinching-party.html
Pin It!