8.19.2013

Tractor Birthday Party

This weekend we had a birthday party for my son who is turning two (how did this happen?!). He is in LOVE with all things that move. Bikes, planes, cars, trains, trucks, etc. And tractors. Tractors. Tractors. So, for his birthday, we did a John Deere themed tractor party. I didn't do a whole lot of decorating, but I made a few decorations that I wanted to show you.

It all started with this invitation that I made. I found the wording on Pinterest somewhere.
And the decorations evolved from there!
Food table and pennant banner
Metal bucket for drinks
Watering trough, pitch forks and scoop shovel signs
Tractor wheels (oreos) and hay bales (rice krispy treats) signs and cupcake toppers

How to:
*Make a pennant banner.
Cut out construction paper in the color you want. Use a sharpie to make your letters. Poke holes on either side of the letter. String twine (or whatever you want to hang it with) through the holes.
 Lay it out to see how you want it to hang.
 Hang it on the wall and enjoy everyone's reaction to this super easy, inexpensive pennant banner!


*Decorate cupcakes.
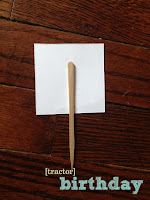
Design your own cupcake toppers. I used Adobe InDesign to make these. Print them on cardstock and cut them out.
Buy some craft picks. I bought these at Hobby Lobby when they were on sale. (700 pieces should last me the rest of my life. Ha.) Hot glue the craft pick to the back of the cupcake topper.
Bake and ice your cupcakes. (Note about icing: I used store-bought, canned frosting, dumped the cans into a bowl, added food coloring and whipped it with a mixer to make the color I wanted. And spreading it with a spatula instead of a knife is MUCH easier! Who knew?) Insert cupcake toppers in order to see what they will look like at the party the next day. Eat one of the samples and give the other one to your mom to eat.

And the guest of honor in a tractor shirt! I bought a plain, white t-shirt and an iron-on decal and made his tractor shirt. (This is the only picture of his shirt at a close range that I could find.)

He especially loved when everyone sang to him. And the chocolate cake. And the icing. And the attention. And blowing out the candles. 

 And a picture of our little family with the birthday boy!

So, what do you think of our tractor birthday party?
Photobucket
Also linking to:
http://www.myrepurposedlife.com
http://www.remodelaholic.com
http://shabbynest.blogspot.com
http://www.thejennyevolution.com/
http://linda-coastalcharm.blogspot.com/
http://www.savvysouthernstyle.net/
Pin It!

8.14.2013

Work Weekend Recap

Last weekend, we had a work weekend. My husband, father-in-law, and mother-in-law were able to take Friday off to start working upstairs. They worked all day Friday, Saturday, and Sunday. We also had both of my parents and a friend helping on Sunday. We got so much done! I won't show you everything, because I want to show you a big reveal when it's all finished, but I can't help but give you another sneak peek!

My mom and I worked on framing, upholstering and adding legs to our box spring. (Tutorial coming soon!)


 The guys drywalled the holes in our bedroom wall.


And sanded, stained, and polyurethaned our floor. (And accidentally broke the window... it was already cracked, it just got worse.)


 And took out our banister and built a new wall.


And took the carpet up and started framing the new rooms.


And my mother-in-law watched our toddler and our friend's 2 kids, plus did all our laundry, cleaned, and helped with the bedroom floor. We weren't busy at all! Ha.
Photobucket
And our friend found us these 2 AMAZING old doors in his cousin's barn that we will be using in the new rooms. And his cousin gave them to us for free. SHOUT OUT to Jon and cousin Dave!


Pin It!

8.13.2013

Master Bedroom Accessories: Before and After

I told you in my post about my thrift store finds that I would be doing some before and after posts about said finds. I've also been redoing some stuff we already had to go with our new master bedroom decor. I can't wait to see what it looks like after it's all put together! For now, here are some before and afters.


I actually tackled my first every pillow recover with a sewing machine for this pillow! And, it's the pillow sham style, so you can take the pillow out. I'm pretty darn proud of myself. (Also props to my mom who helped me figure out how to do it!)


Remember this gem? I LOOOOVEEEE the details on the mirror. The before color, not so much. Spray paint to the rescue! I used Valspar Tropical Oasis in a gloss finish (which is the only teal color I could find anywhere, and it's sold at Lowe's).


And here is my birdcage. It was a dark red and is now a nice shade of watermelon (That's what I'm calling the pink color, so my husband doesn't think I'm decorating our bedroom with pink.) I used Krylon Watermelon (see?!) spray paint in a gloss finish, which I picked up at Walmart.

Stay tuned for more before and afters! And for a progress report pretty soon about how our room is looking.

Photobucket
Pin It!